Isn’t that what you want at the end of the day?
You go to the play ground and after training a few times, you effortlesly progress into a handstand.
Hopping from one arm to the other – turning up your music at the same time.
While others are still struggling and doing it one step at a time.
You make it seem like it’s your second nature.
Although it takes some people years, you aren’t even breaking a of sweat.
And what’s the secret to this level of handstand mastery?
Thinking you will get it overnight!
Taking a leap instead of doing it one step at a time.
I mean, the best things in life come easy, don’t they?
Well, prepare yourself for a shock…
Why You Need To Take It One Handstand Progression At A Time
Want to know something universal?
If you really want to get the most advance exercises, you need to take it one step at a time.
Just trying it without proper preperation and going for it blindly is the last thing you should do.
Don’t try to run if you can’t crawl, learn to crawl first.
Regardless, many beginners see someone doing a handstand online, go to the park (I’m guilty of this too) – without any knowledge of the skill it requires – and then expect to land their first handstand.
In reality this does not work that way, go try it if you don’t believe me.
Too many beginners are wasting their time pursuing a strategy of randomn trial-and-error which will probably never pay off the way they hope it will.
That’s why the following exercises will give you a step-by-step guide to build the basic foundation for a handstand.
Key Takeaway: Be patient, follow the right steps and don’t expect to succeed in your first attempt. Expect to learn instead.
Especially when it comes to the handstand, the importance is in adding a little bit of skill every time.
Mastery will come in time, but not when you want it to come.
1. Preparing Your Wrists
Prior to doing any type of handstand practice, you will need to strengthen your wrists.
Out of all the joints the wrists are probably the least prepared for bigger loads in inversions.
Especially because we use them so little throughout the day.
Make sure you are able to do these wrist exercises prior to starting your handstand training.
2. Plank Positioning
A good handstand starts with a strong plank.
Eventually your entire weight will be on your hands and shoulders.
Having this ability is therefore essential.
A plank will allow you to get a sense of what it feels like to place a load on your shoulders, elbows and wrists.
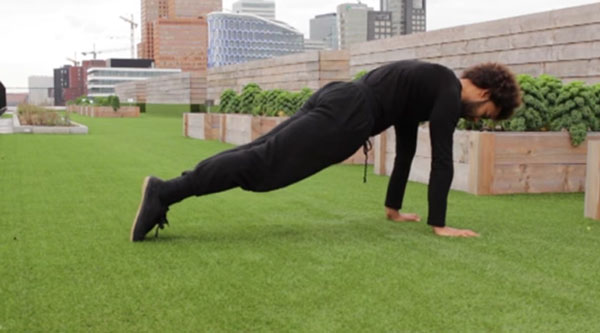
Primary focus: Getting a sense of weight transfer and building wrist, shoulder and core strength
1. First place your hands on the ground at shoulder width.
2. Straighten your legs and lock your elbows by turning your shoulders outwards while keeping your hands on the ground.
3. Stiffen your body by contracting your core, abs and back and especially butt muscles.
Mastery 5×60 seconds
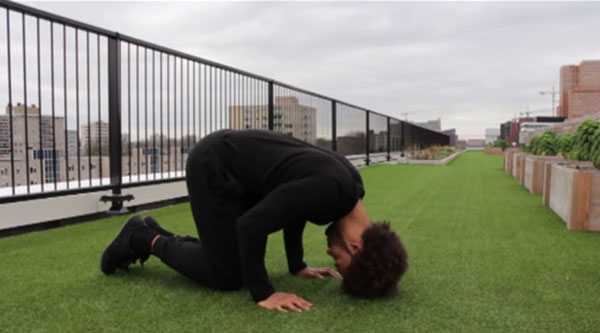
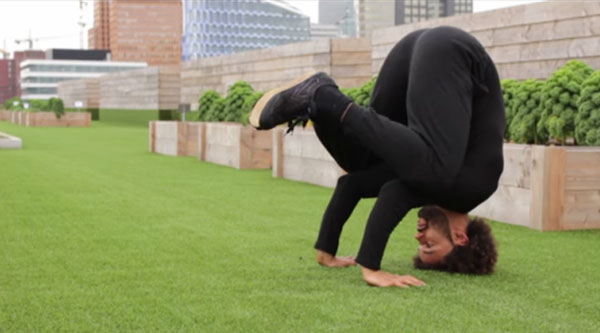
3. The Crow Stance

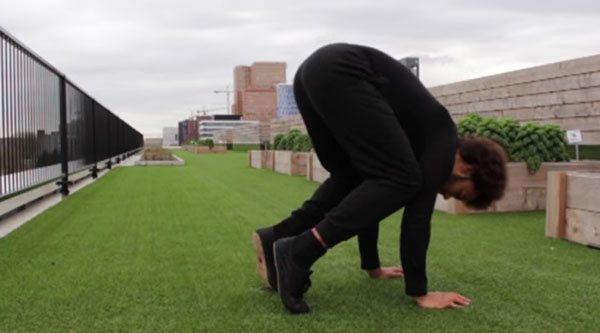
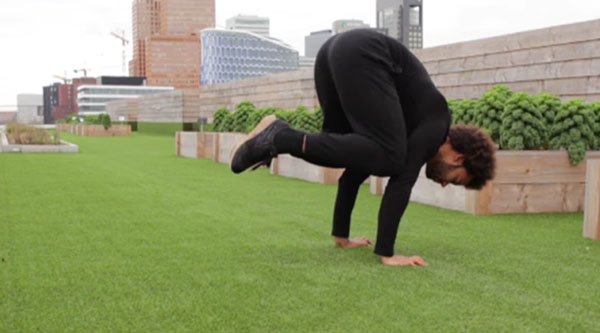
Primary focus: Developing a sense of balance and building strength in the wrists and fingers
1. First place your fingers on the ground at shoulder width and place your knees as close to your armpits as possible
2. Grab the ground with your fingers and start leaning forward until you feel the shift in your center of gravity
3. Keep your feet on the ground while doing so and slowly lift one after the other until both are off the ground.
4. Try to move your feet up until your knees reach about a 90 degree angle
5. Bring your feet together and don’t forget to keep breathing
6. Get out of your crow stance by reversing the same steps.
Mastery 5×60 seconds
Note: Be careful and do this on grass or ground which allows for a soft landing until it becomes easy. Make sure you lean forward in a controlled way and remember to tuck your chin to your chest if you fall, don’t speed up the process too much or you might end up like this kid.
4. The Tucked Headstand
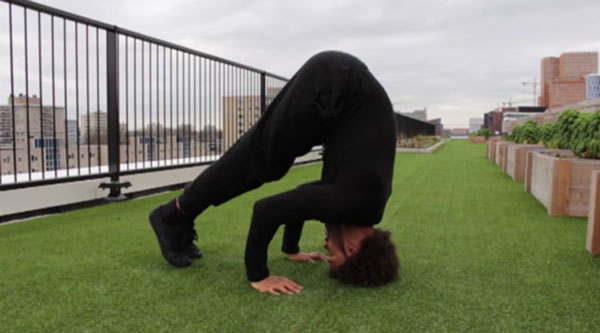
Primary focus: Developing a sense of inversion and balance
1. First kneel down and place your fingers on the ground at shoulder width.
2. Bend your head towards the ground so your arms are at around a 90 degree angle.
3. Straighten your legs and tip-toe your feet to your head as close as possible.
4. Find the point at which your center of gravity shifts from your feet to your hands and head.
5. Slowly bring one leg to your elbow, followed by the next and place the inside of your knees on the outside of your elbows/upper arm.
6. Get out of your half headstand by reversing the same steps.
Mastery 5×60 seconds
5. The Headstand
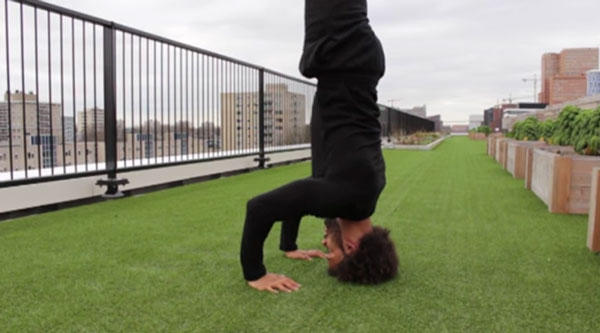
Primary focus: Balancing and getting a sense of inversion
1. First kneel down and place your fingers on the ground at shoulder width
2. Bend your head towards the ground so your arms are at around a 90 degree angle
3. Straighten your legs and tip-toe your feet to your head as close as possible
4. Find the point at which your center of gravity shifts from your feet to your hands and head
5. Slowly bring one leg to your elbow, followed by the next and place the inside of your knees on the outside of your elbows/upper arm
6. Once you have a strong half head stance, straighten one leg to the sky followed by the other leg while contracting your core and glutes. If you aren’t confident enough, use a spotter or a wall just in case.
7. Get out of your headstand by reversing the same steps
How To Do A Handstand One Step At A Time
Serious about getting your handstand?
Start building a strong foundation first.
Work hard. Earn It.
Don’t be afraid to faceplant. Don’t be afraid to fall. Don’t be afraid to fail.
Because here is the thing. All those things will happen.
And best things in life don’t come easy.
But you become better.
One faceplant at a time.
Beast Mode ON!
Now I’d like to hear from you:
Did you like this post?
Or maybe you have a question.
Either way, leave a quick comment below right now.
im very beginner to handstand but i would like to do it what can i do
Hey Mehmet,
Great question!
Start with the progressions which you find in this guide.
These will build the basic layer which you need to start handstand training, master these first.
Beast mode ON!
fantastic write up on handstand progressions, just whatt I wanted and with pictures to guide you.
have been picking up bits here and there, but this is the best ive seen so far. many thanks for this,
I’m sure now that I will succeed with following this guide.
Hey Barry,
You are more than welcome!
Keep up the good work and thanks for your message.
Beast mode ON!
This is so helpful. I am not sure if you are still checking this but it is worth a try. I just started calisthenics and tried doing headstands and handstands and can’t get close to even the crow stance. A successful handstand is going to be my main goal as I build my calisthenics strength. That will be a great day! Regarding timing, etc. does this make sense?
-Weeks 1-4ish, wrist strength–doing the wrist stretches and pushups from the other pages you’ve linked to. Starting on the knees and then working into the regular form for the wrist pushups until they are second nature. I will also be doing elevated planks throughout this time. Should I skip this on days when I do lower body?
-Weeks 5-6ish, crow stance and continuing with the wrist/plank exercises. (Using wall for support)
-Weeks 7-8ish, tucked headstand and more wrist/planks. (Using wall for support)
-Weeks 9-12ish, regular headstands and more wrist/planks. (Using wall for support)
-Weeks 13-16ish, wall supported handstands
-Week 17, handstand!!!?????
Feasible? Unrealistic? Do I need a lot more time? I am in pretty good shape but the calisthenics-only training I’ve started 2ish weeks ago is a whole different ballgame from weight training. I am weaker than I thought. Also is wrist strengthening/planks ok to do every day or should I skip days?
Your guides are awesome. Thank you.
Hey Max,
Great stuff!
Handstand work can be done daily, but you need to keep a close eye on the wrist. Realistic is about 1 year at least. It also depends what you define as ‘having a handstand’.
It’s a path of patience and make sure you enjoy the struggle that comes with it.
Beast mode ON!
Thanks for the quick response. I’ll multiply my plan by 3 since it was 17 weeks anyway, lol. I’ll get back to ya in a year with my progress 🙂 Peace!